
Introduction
One of the most important concepts within the Fractal Model is understanding the difference between a standard Candle 2 or Candle 3 closure and an Ideal Formation.
While many traders focus solely on finding Candle 2 and Candle 3 closures, the highest-probability opportunities occur when those closures simultaneously create a protected swing. This additional layer of confirmation helps validate the swing point and increases the likelihood of continuation away from the level.
In this lesson, we’ll break down Ideal Formations, how to identify them, and why they can help improve trade selection within the Fractal Model.
What Is an Ideal Formation?
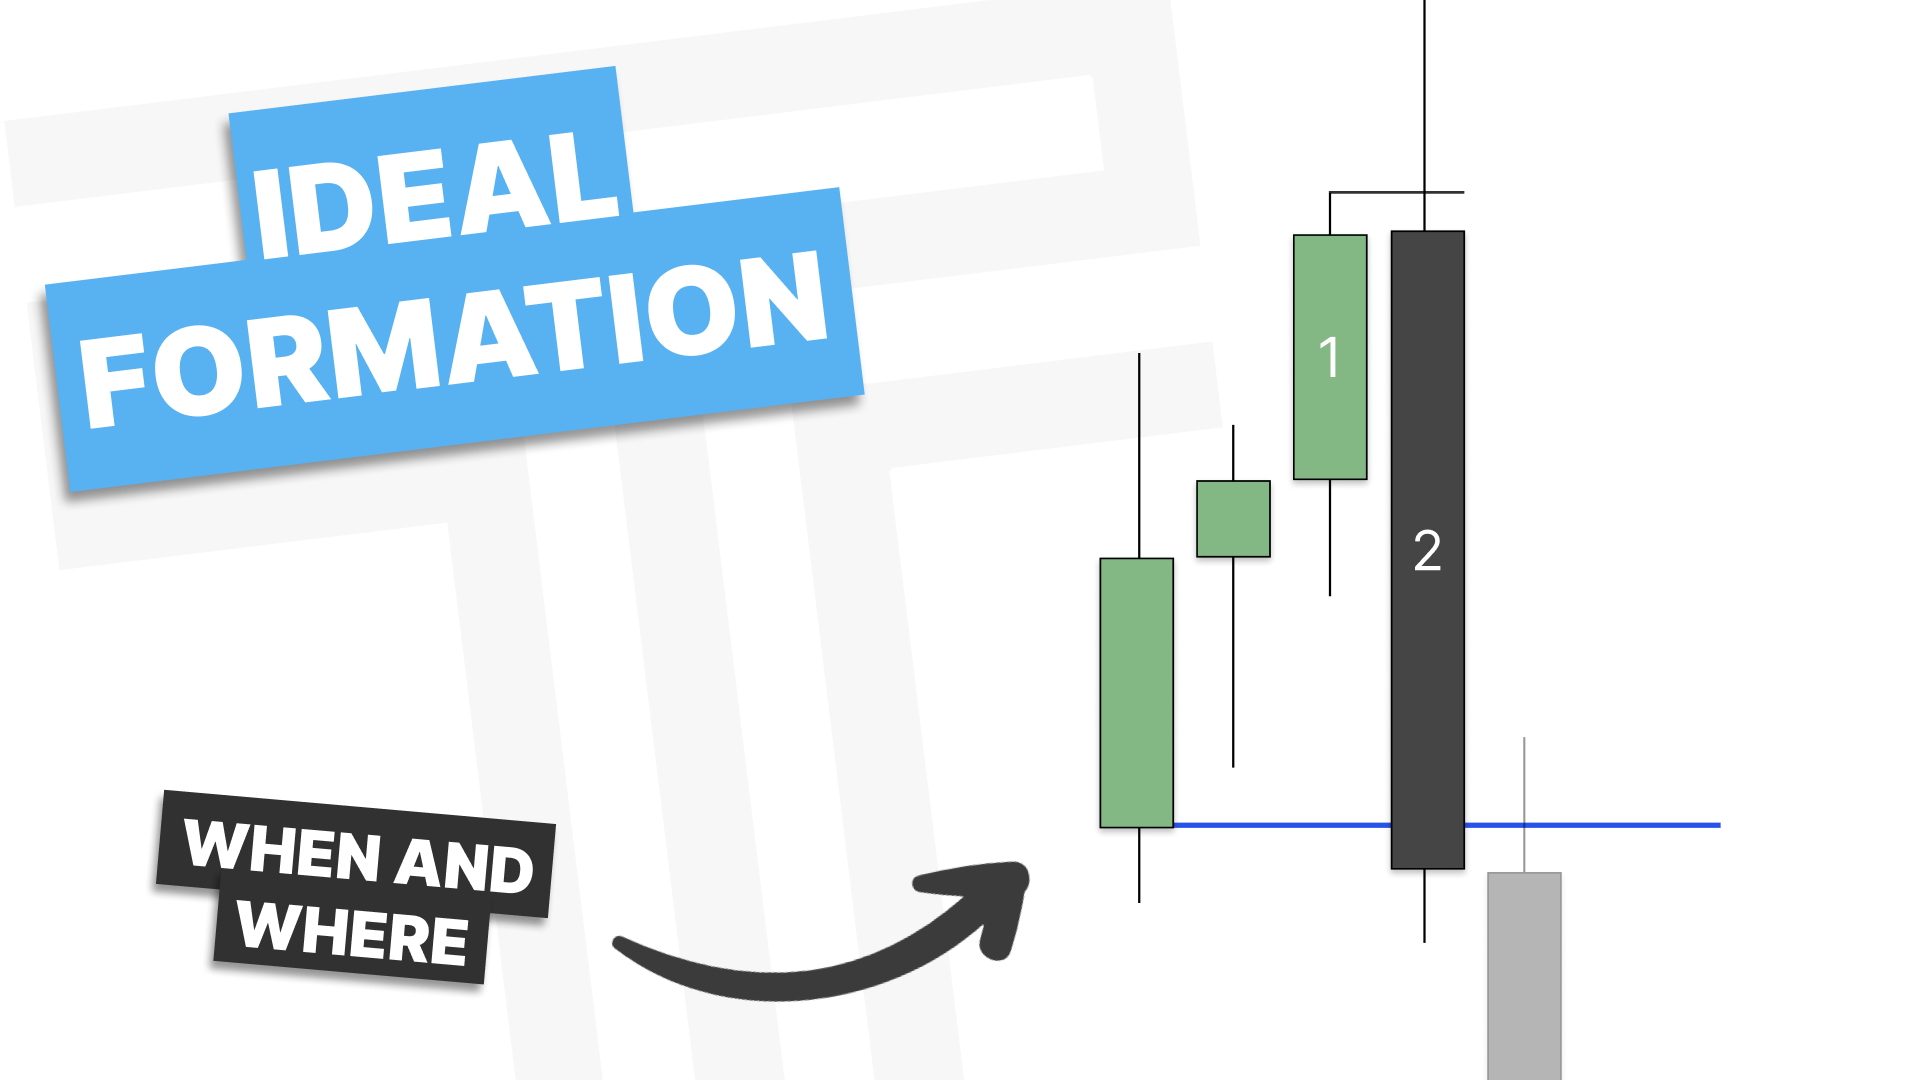
An Ideal Formation occurs when a Candle 2 or Candle 3 closure simultaneously creates a protected swing.
Rather than simply seeing a candle close beyond the previous candle’s body, we want to see price confirm a change in delivery by closing through the opposing series of candles responsible for creating the swing point.
When both conditions occur together, the market is providing stronger confirmation that the swing is protected and that price may be ready to expand away from the level.
This is what separates an Ideal Formation from an ordinary candle closure.
Understanding Protected Swings
Protected swings are the foundation of an Ideal Formation.
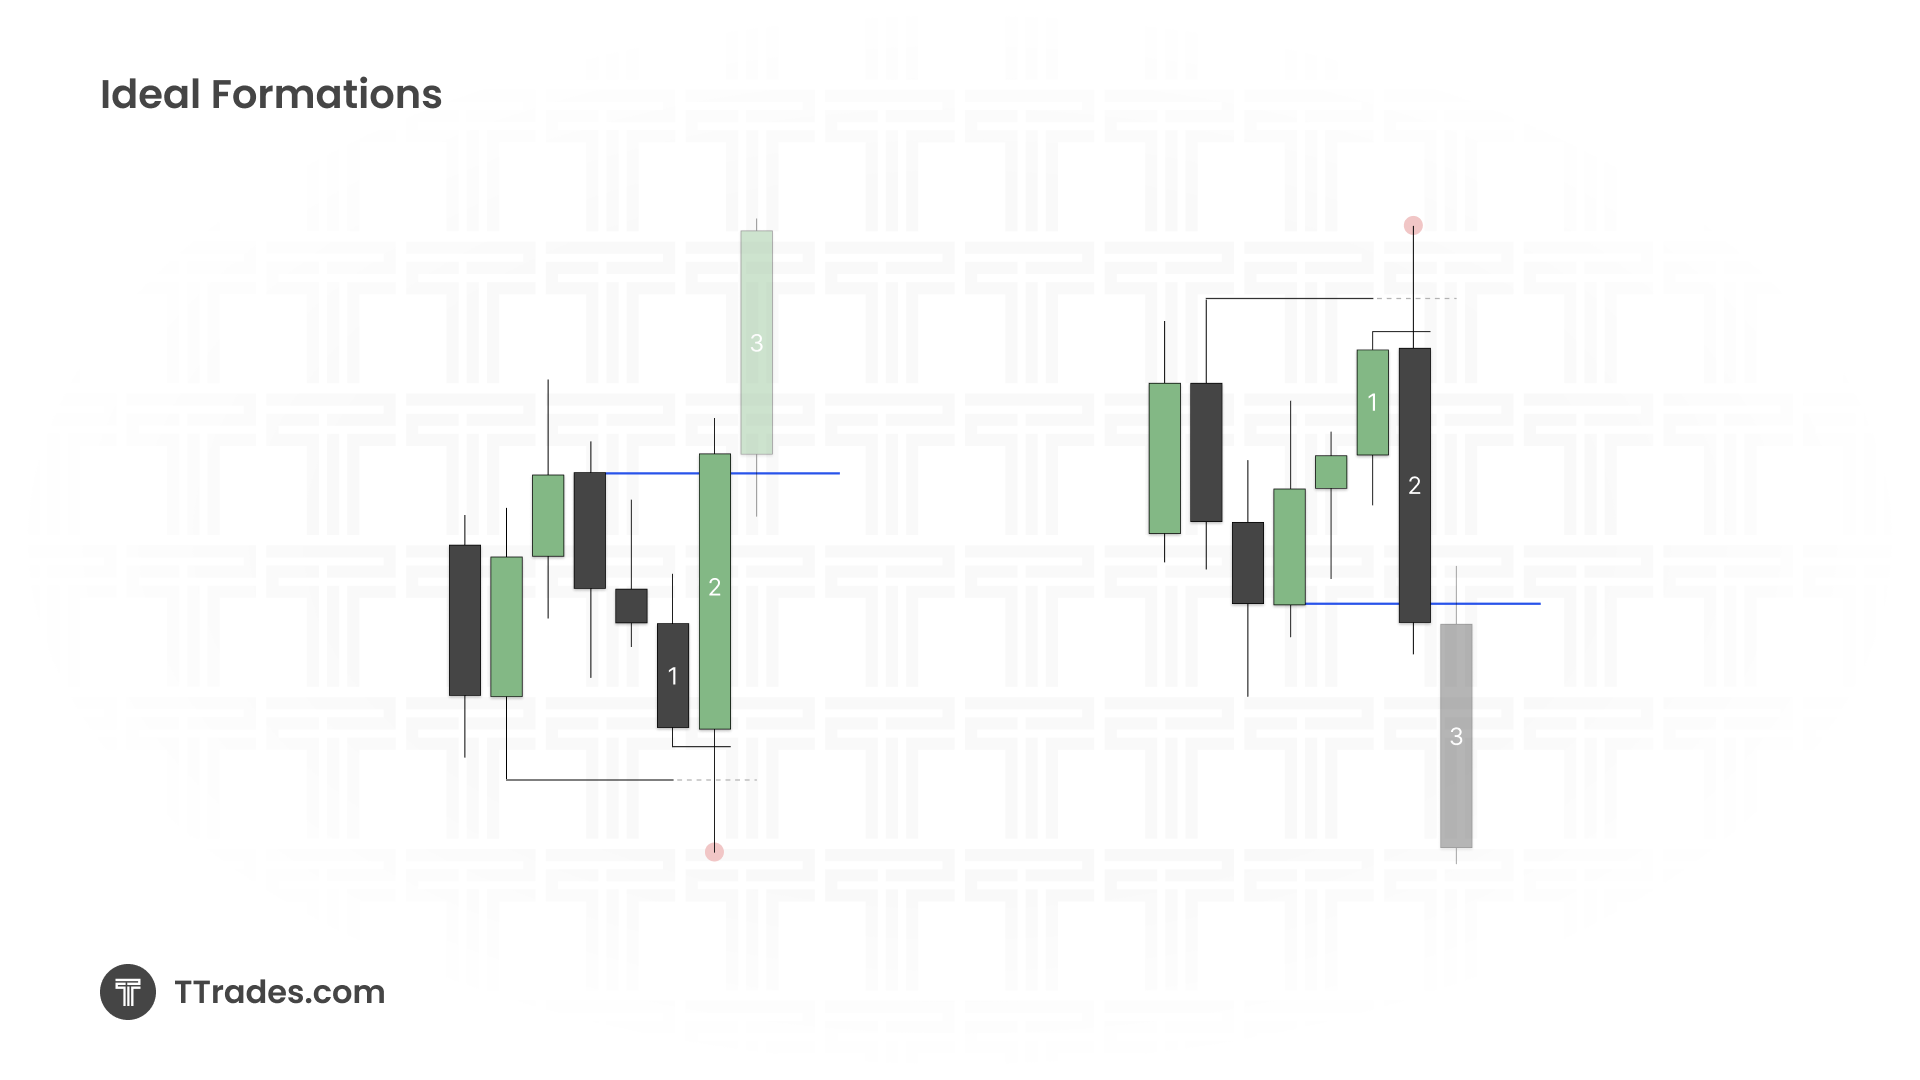
A protected swing is created when price closes through the series of opposing candles that led into a high or low.
For a bullish setup:
- Price sweeps liquidity beneath a low.
- Candle 2 or Candle 3 closes bullish.
- The closure breaks through the series of down-close candles.
- A protected swing low is established.
For a bearish setup:
- Price sweeps liquidity above a high.
- Candle 2 or Candle 3 closes bearish.
- The closure breaks through the series of up-close candles.
- A protected swing high is established.
Once a protected swing forms, the expectation shifts toward continuation away from that level.
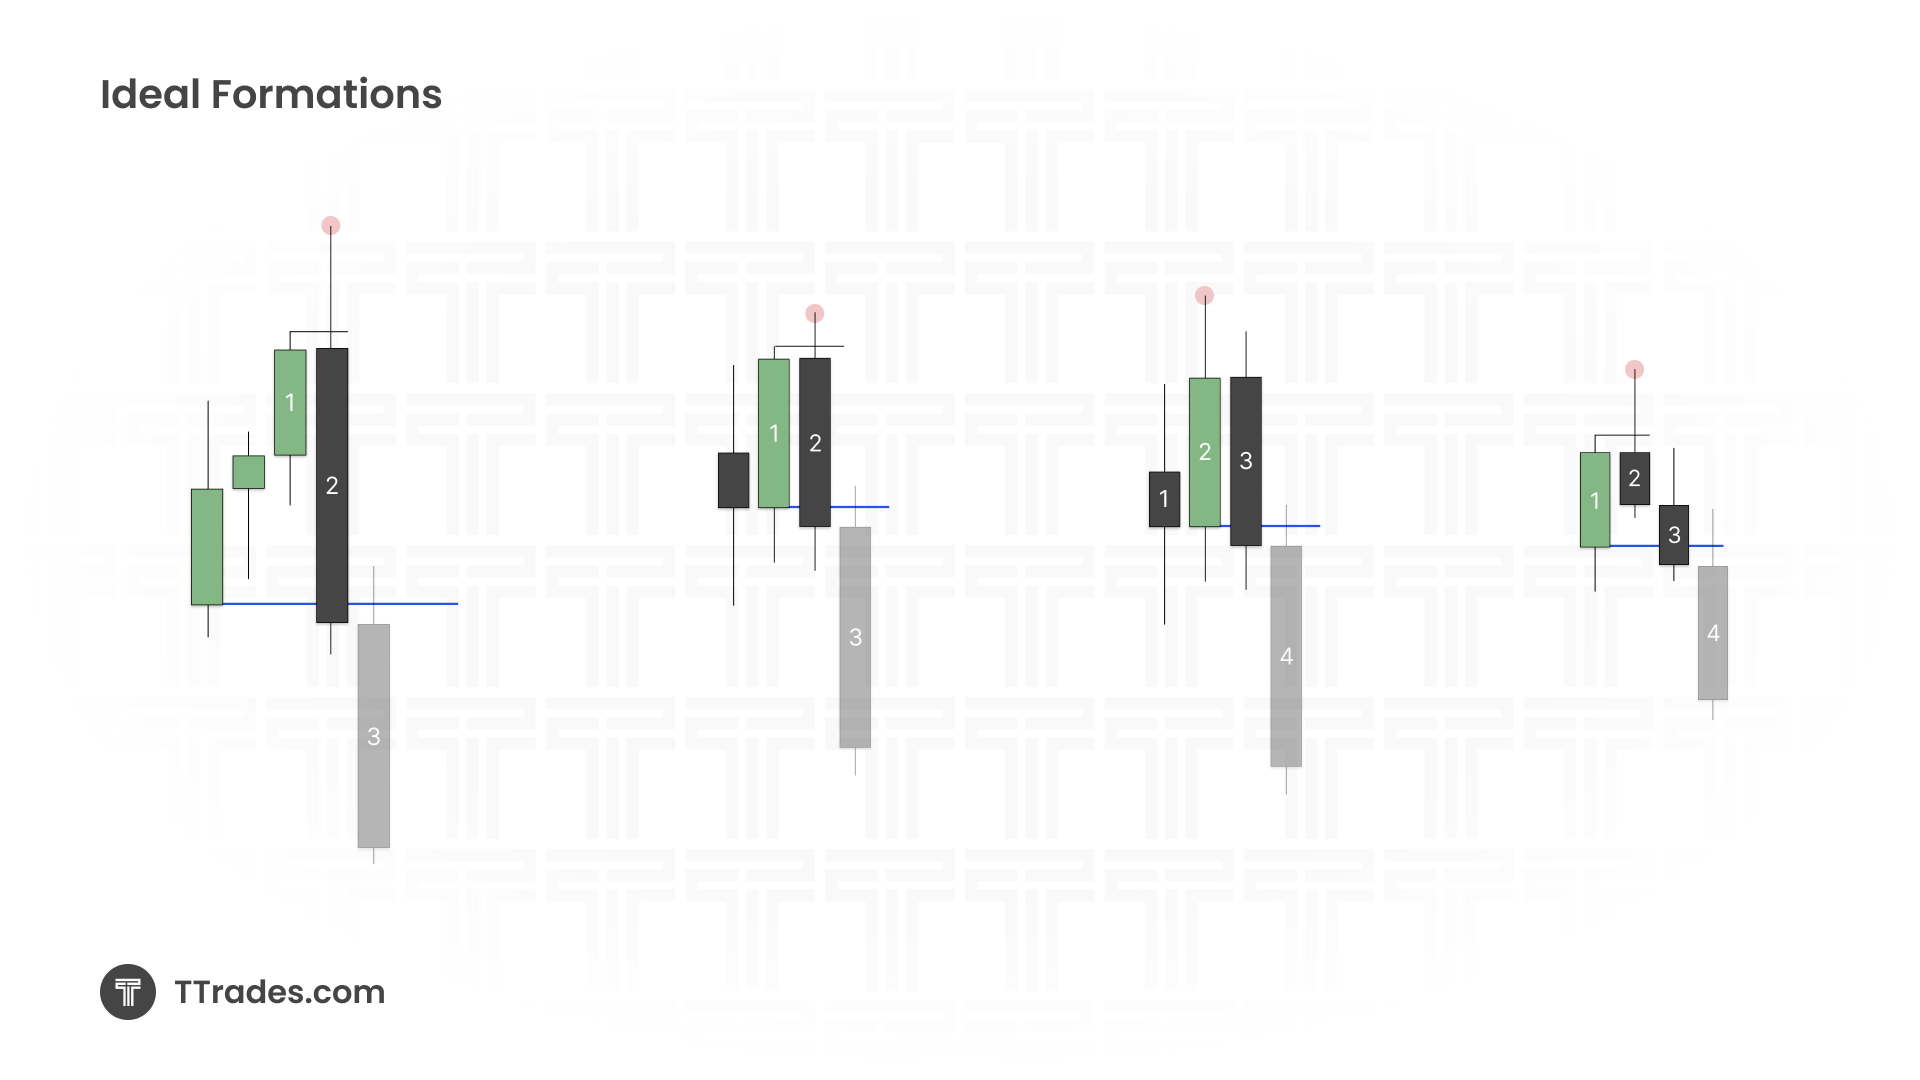
The Ideal Candle 2 Formation
The strongest version of an Ideal Formation occurs when Candle 2 creates both the closure and the protected swing.
For a bullish example:
- Price trades into a point of interest.
- Liquidity below a low is swept.
- Candle 2 closes bullish.
- The closure breaks through the opposing down-close candle series.
- A protected swing is created immediately.
For a bearish example:
- Price trades into a point of interest.
- Liquidity above a high is swept.
- Candle 2 closes bearish.
- The closure breaks through the opposing up-close candle series.
- A protected swing is created immediately.
Because both confirmations occur on the same candle, Candle 3 often becomes the expansion candle traders look to participate in.
Why Some Candle 2 Closures Are Not Ideal
One of the most common mistakes traders make is assuming every Candle 2 closure is an Ideal Formation.
This is not the case.
A valid Candle 2 closure only becomes ideal when it also creates a protected swing.
If price closes beyond Candle 1’s body but fails to close through the opposing candle series, then the protected swing has not been confirmed.
The setup may still be tradable, but it lacks the additional confirmation that makes an Ideal Formation higher probability.
This distinction is critical when evaluating trade opportunities within the Fractal Model.
The Ideal Candle 3 Formation
Not every setup becomes ideal on Candle 2.
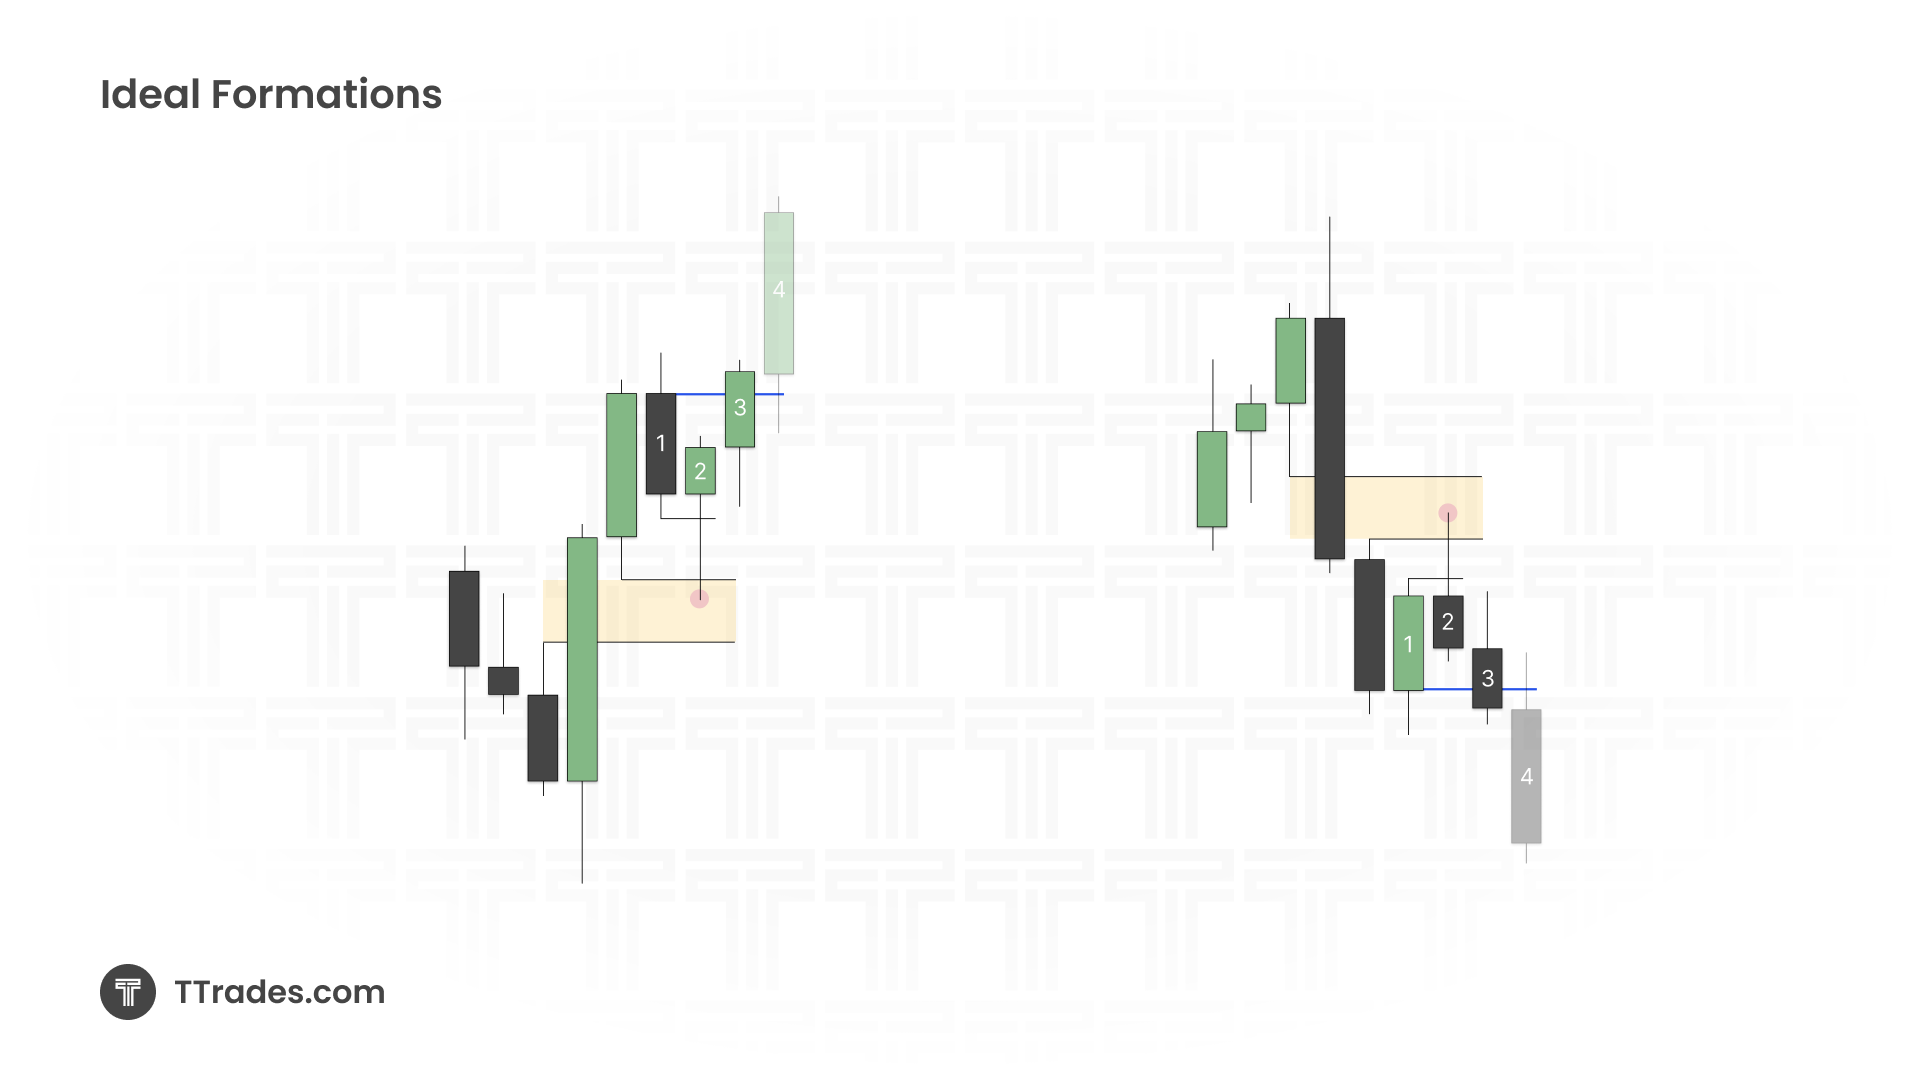
Sometimes Candle 2 provides the initial closure, but Candle 3 is required to complete the protected swing.
In these situations:
- Candle 2 establishes directional intent.
- Candle 3 closes strongly through the series of opposing candles.
- A protected swing is confirmed.
- The setup becomes ideal for trading Candle 4.
Trading Candle 4 After an Ideal Formation
When the protected swing forms on Candle 3, traders often focus on Candle 4 as the continuation candle.
At this stage, the market has:
- Created a valid closure.
- Confirmed a protected swing.
- Established directional intent.
- Completed a valid fractal structure.
This provides additional confidence that price may continue away from the level.
Rather than chasing the move, traders can monitor key levels and look for a shallow retracement before continuation.
Key Levels to Mark Out
After identifying an Ideal Formation, there are two primary levels that should be marked on the chart.
The first is the opening price of the opposing candle series that created the protected swing.
The second is the equilibrium (EQ) of the confirmation candle.
These levels often act as support or resistance as the next candle forms.
When price respects these levels and produces a shallow wick, it can provide confirmation that the market is continuing in the intended direction.
Why Point of Interest Matters
An Ideal Formation should never be traded as a standalone pattern.
The setup becomes significantly more effective when it forms at a meaningful point of interest.
Common examples include:
- Fair Value Gaps (FVGs)
- Liquidity sweeps
- Previous highs and lows
- Premium and discount arrays
- Higher timeframe points of interest
The point of interest provides the reason for the reaction.
The Ideal Formation provides confirmation that the reaction is taking place.
When both align, traders have a stronger framework for identifying high-probability opportunities.
Common Mistakes Traders Make
Some of the most common mistakes include:
- Treating every Candle 2 closure as ideal.
- Ignoring protected swing confirmation.
- Trading the pattern without a point of interest.
- Marking the wrong series of opposing candles that formed the swing high or low
- Entering before the formation is fully confirmed.
The objective is not simply finding a candle closure.
The objective is finding a candle closure that confirms a protected swing at a meaningful point of interest in the market.
Final Thoughts
In this lesson, we broke down Ideal Formations and how they can be used to identify high-probability swing points within the Fractal Model.
By combining Candle 2 or Candle 3 closures with protected swing confirmation, traders can better validate market structure and focus on continuation opportunities with greater confidence.
Rather than treating every candle closure equally, focus on the formations that simultaneously confirm a protected swing at a point of interest. These are often the cleanest setups and provide the strongest framework for identifying potential expansion moves.