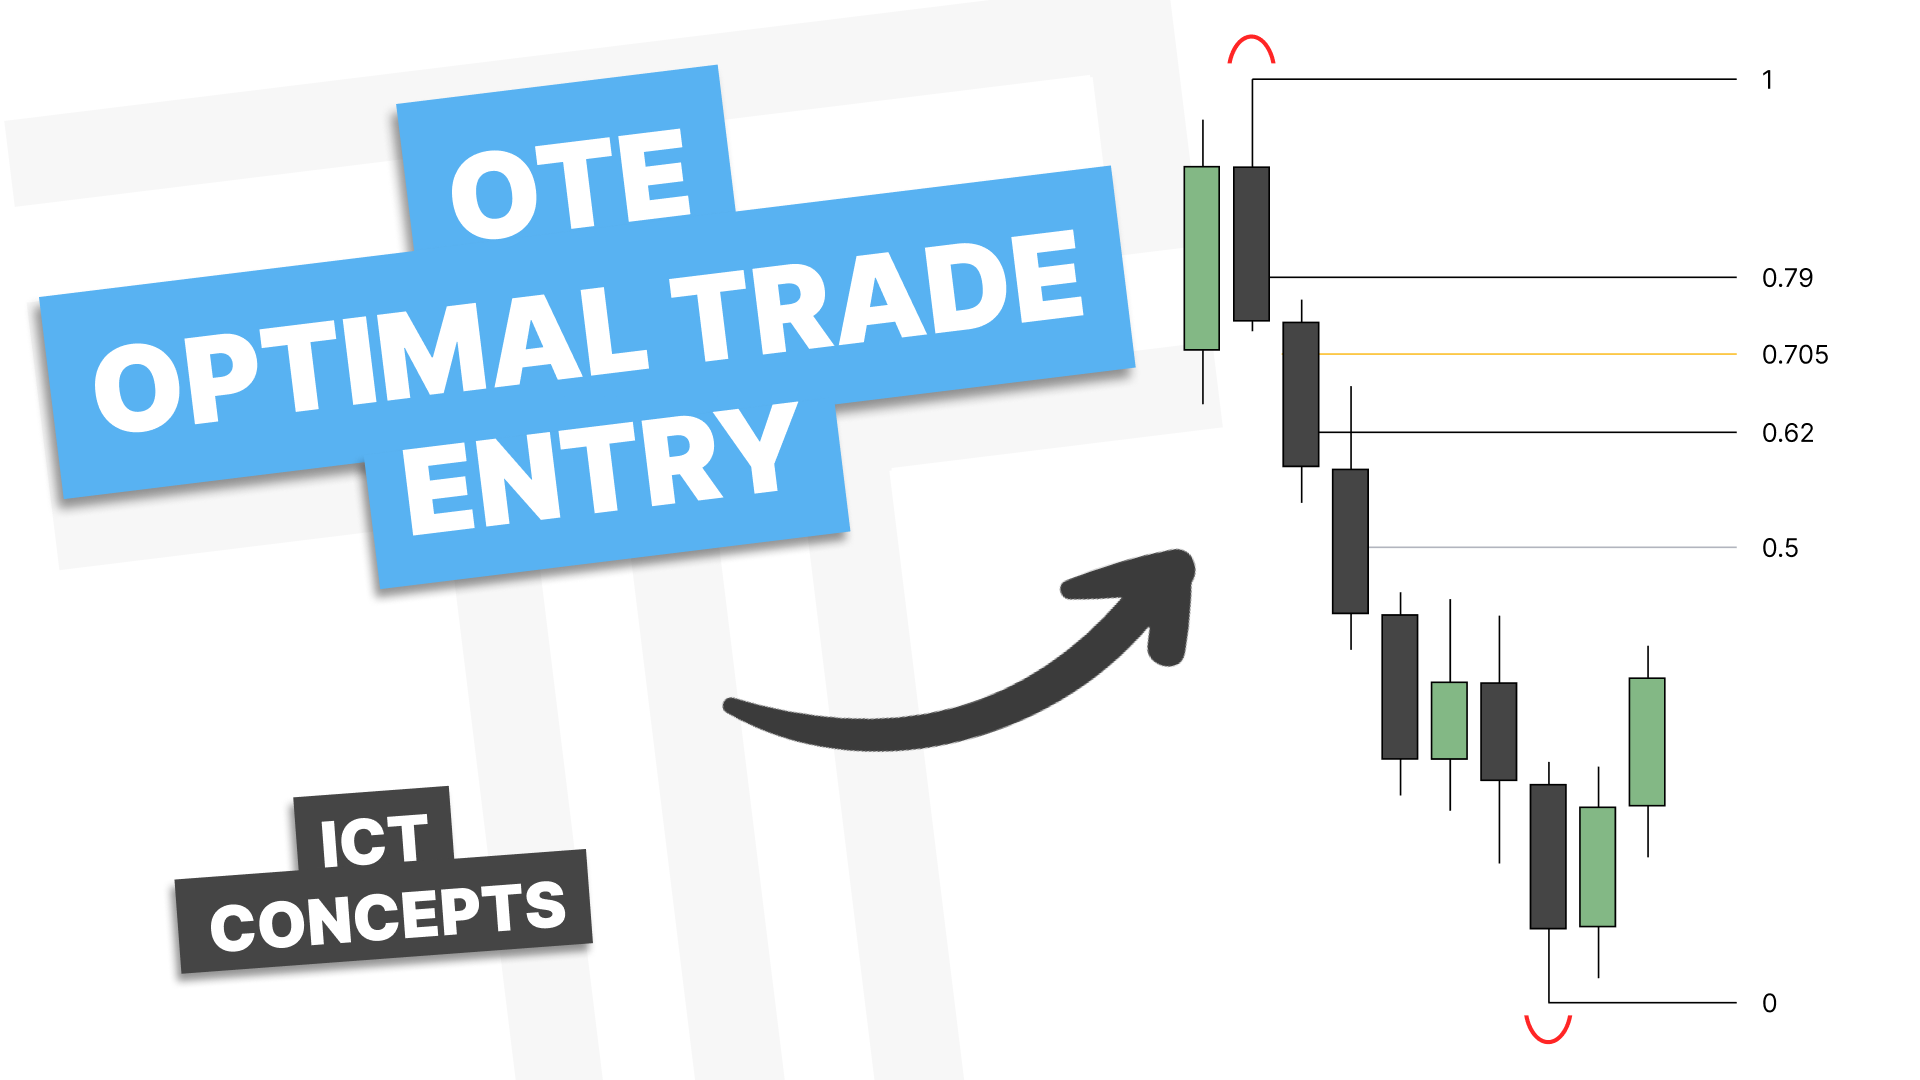
Introduction
In this guide, we are breaking down optimal trade entry in a practical, chart focused way. This explanation is designed to mirror how OTE is actually used in real trading, not just theory. The goal is to help you understand the Fibonacci settings, how to draw them correctly, and how to align OTE with other PD arrays for higher probability trades.
This assumes you already understand discount and premium. If not, that concept should be reviewed first, because optimal trade entry builds directly on it.
Understanding the Fibonacci Settings for OTE
Before using optimal trade entry, the Fibonacci retracement tool needs to be set correctly.
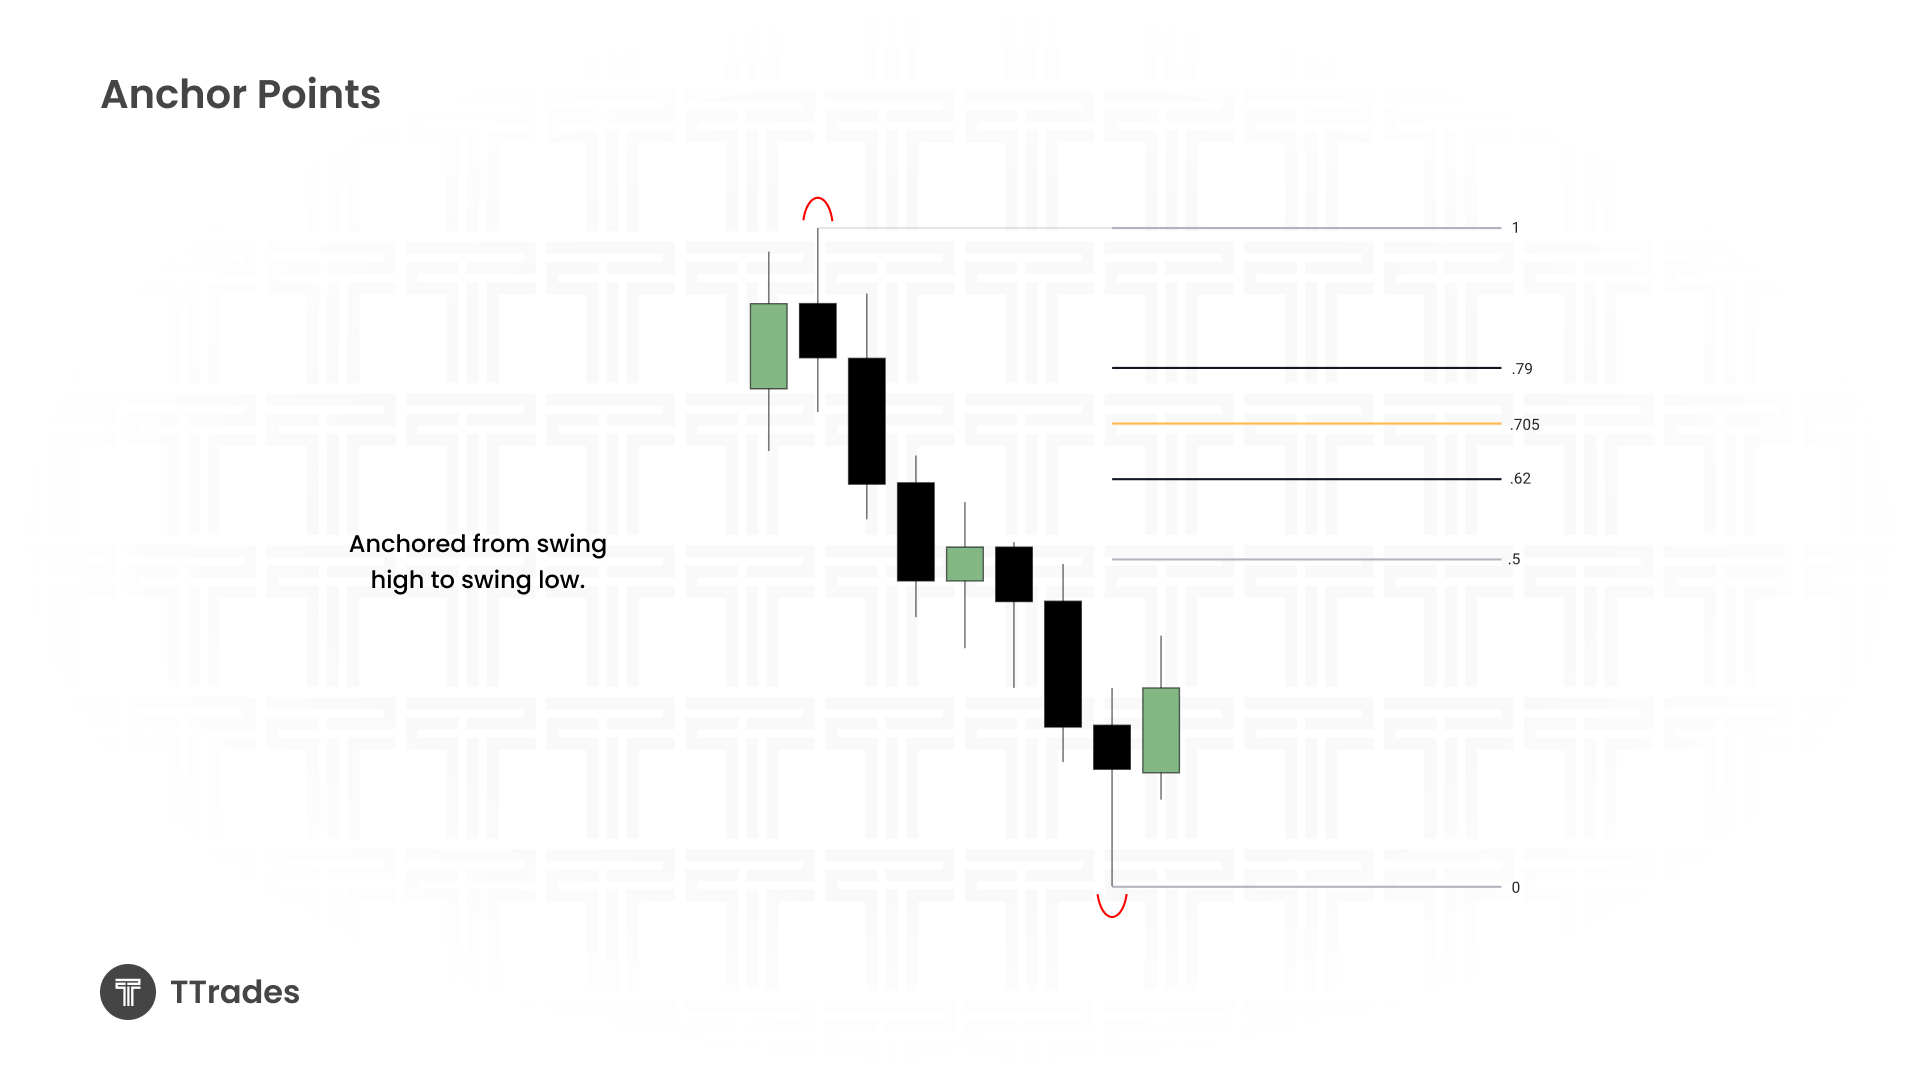
The key levels used are 0 and 1 to define the range, 0.5 for equilibrium, and the 0.62, 0.705, and 0.79 levels.
The optimal trade entry zone lives between the .62 and .79 retracement, with special emphasis on the .705 level. This zone represents an ideal retracement area where institutional re entries often occur.
Once these levels are added in TradingView, the Fibonacci tool will visually display discount and premium, the OTE zone, and equilibrium.

How to Draw the Fibonacci Correctly
Using Fibonacci correctly starts with identifying a swing high and a swing low.
In a bearish scenario, Fibonacci is drawn from the swing high down to the swing low. In a bullish scenario, it is drawn from the swing low up to the swing high. Once the range is defined, the retracement levels are automatically plotted and the OTE zone is established.
If swing highs and lows are unclear, this ties directly into liquidity concepts and market structure.
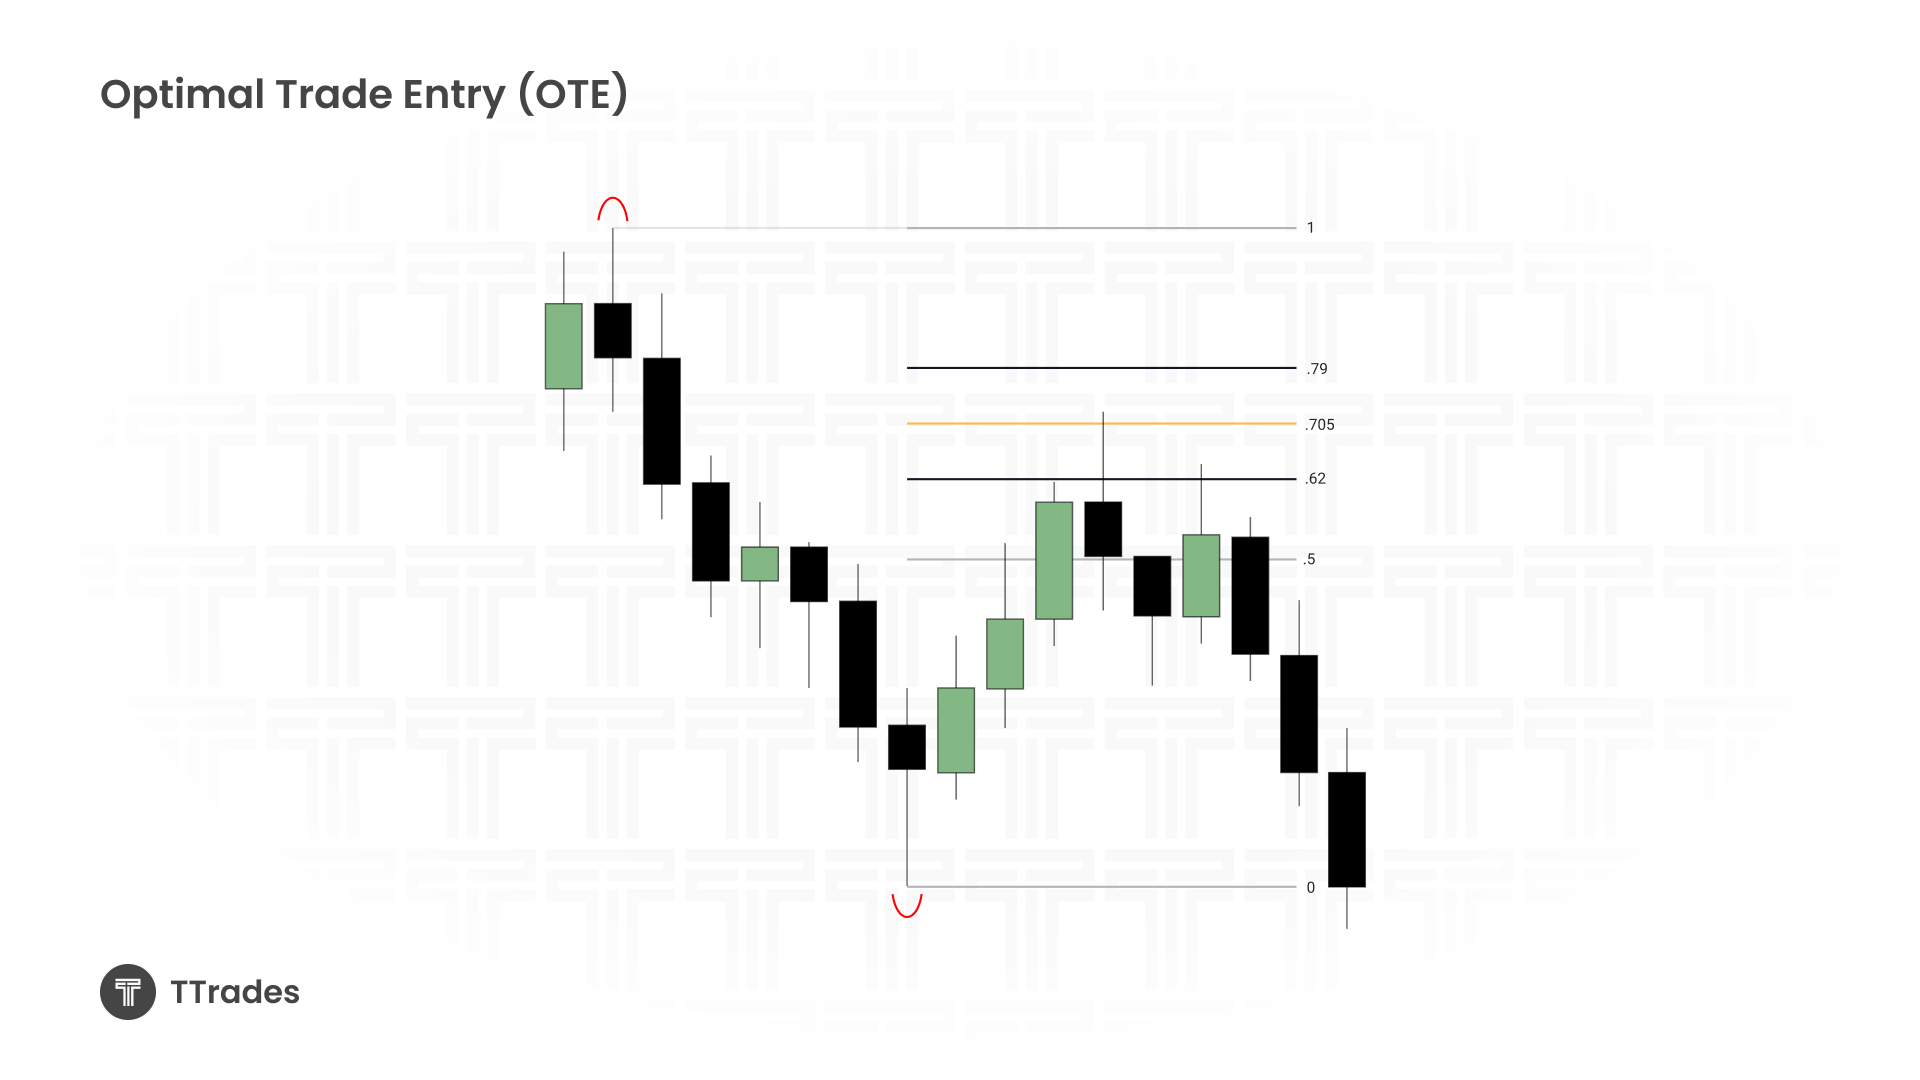
Using OTE in a Bearish Example
In a bearish market structure, price first forms a swing high and then a swing low. Fibonacci is drawn from high to low, and price is expected to retrace into the 62 to 79 OTE zone.
Ideally, price taps near the 70.5 midpoint before displacing lower and reaching for sellside liquidity. This is where short entries or lower time frame entry models are typically sought. In real market conditions, price often reacts very precisely from this zone before continuation.
Using OTE in a Bullish Example
In a bullish scenario, a swing low is formed first and price expands higher until a swing high is established. Fibonacci is drawn from low to high, and price is expected to retrace into the optimal trade entry zone.
From there, the ideal outcome is a reaction higher, often targeting buyside liquidity or inefficiencies such as fair value gaps resting above the range.
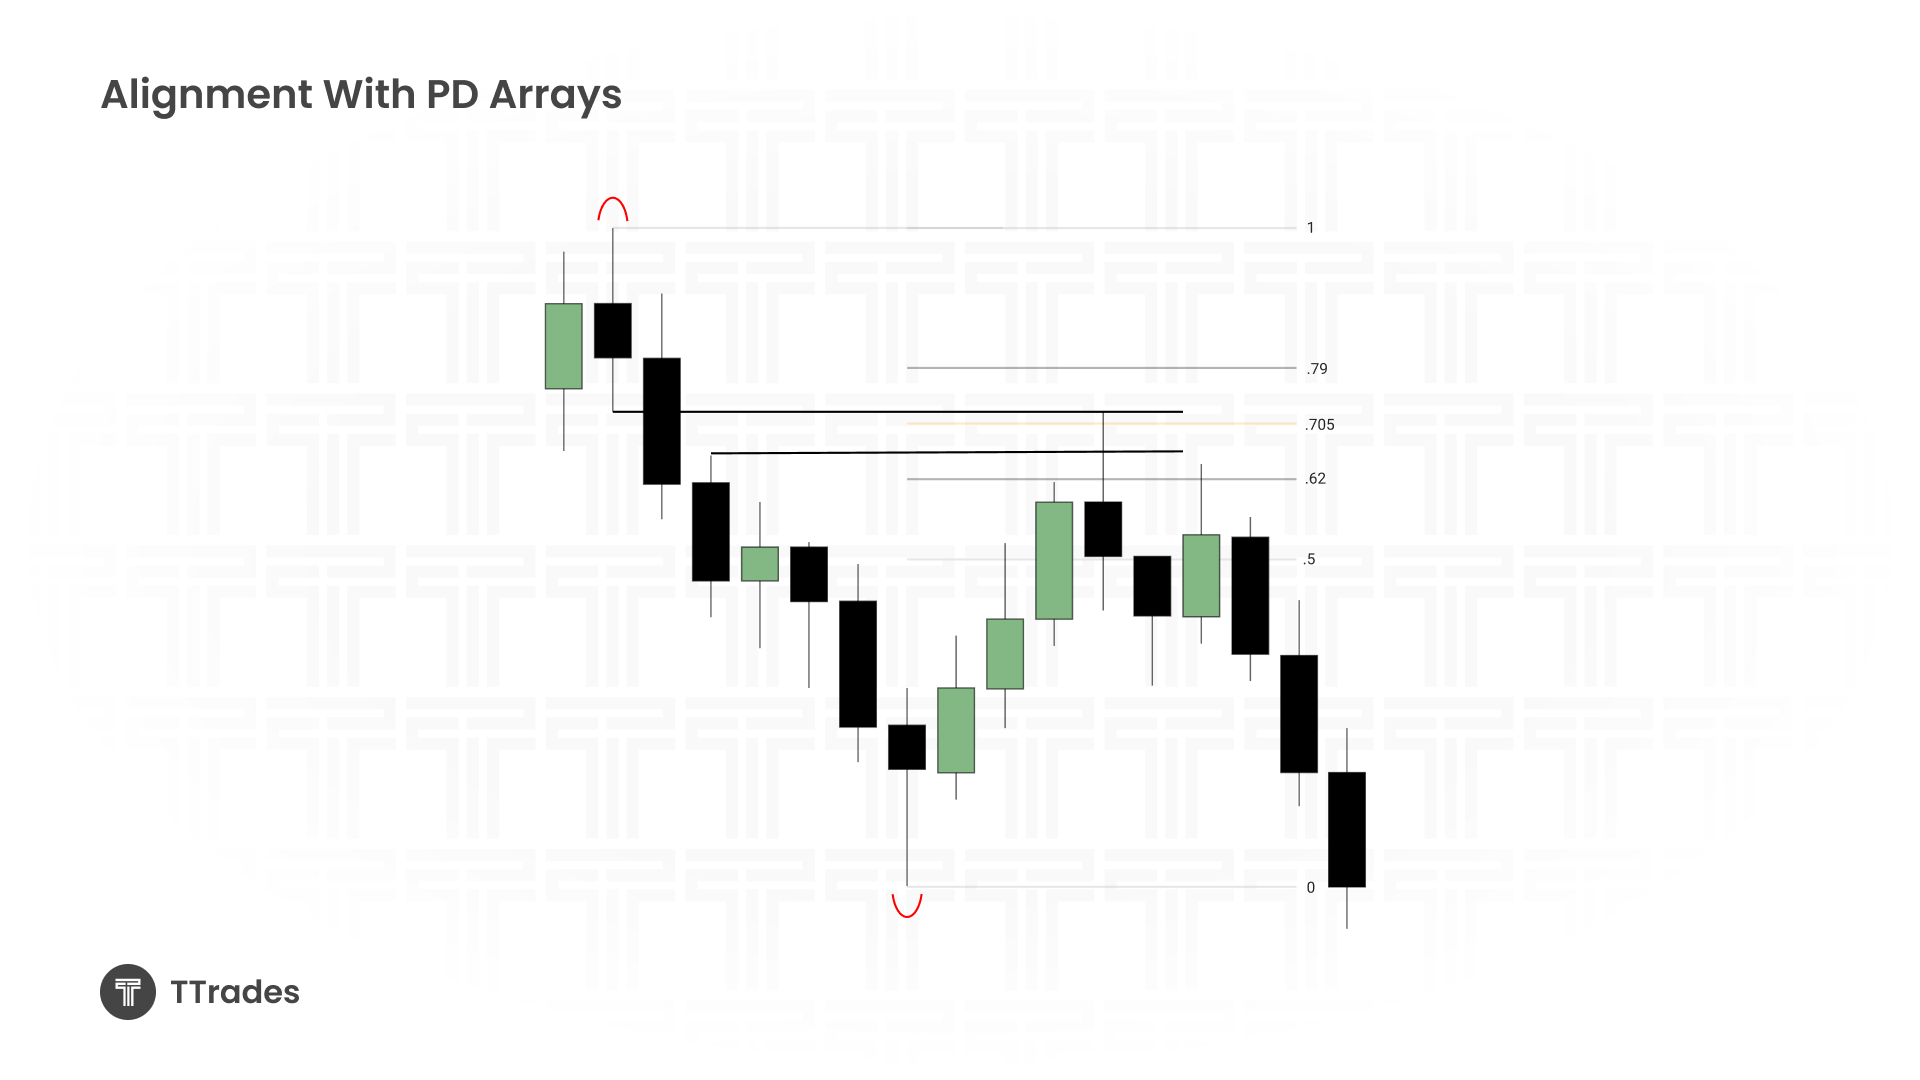
Aligning OTE With PD Arrays
Optimal trade entry becomes significantly more effective when aligned with PD arrays.
These can include fair value gaps, order blocks, volume imbalances, prior highs or lows, or breakers. When an OTE overlaps with one or more of these areas, it forms a strong point of interest. This overlap adds confluence and increases conviction in the setup.
Using Multiple OTEs Across Timeframes
Optimal trade entry works best when applied through top down analysis.
A higher timeframe displacement range can be marked first, followed by waiting for price to retrace into OTE. Once price reaches that area, dropping to a lower timeframe often reveals a new displacement, which creates another OTE. This process allows for layered entries with tighter risk and clearer structure.
For example, a daily chart can define the primary range, the hourly chart refines the retracement, and the five or one minute chart provides execution.
Kill Zones and Execution Precision
Timing plays a major role in execution.
Even when price enters an OTE zone, trades taken outside of kill zones should be avoided. Often price will generate liquidity first, form equal highs or lows, and then tap into the OTE during a session window. This is typically followed by displacement and a clean entry model.
Patience is critical here.
Putting It All Together With Risk to Reward
Once price reacts from optimal trade entry, the risk to reward framework becomes clear.
The ideal entry is near the 70.5 level, while a more aggressive entry may be taken at the 62 level. Targets are commonly prior highs or lows, liquidity pools, or session objectives such as the daily open. Many of these setups naturally produce 3R or greater when executed properly.
Final Thoughts
Optimal trade entry is a framework that works best when combined with market structure, liquidity, PD arrays, kill zones, and multi timeframe analysis. When these elements align, OTE becomes a powerful tool for precision trading.