
Introduction
In trading, mitigation blocks are a powerful tool that can help refine entries and build confluence. While many traders are familiar with order blocks, breaker blocks, and fair value gaps, mitigation blocks often sit in the background as a less-discussed but highly effective element of price action. In this blog, we’ll walk through what a mitigation block is, how it differs from a breaker block, and where it can be applied effectively in live charts.
What is a Mitigation Block?
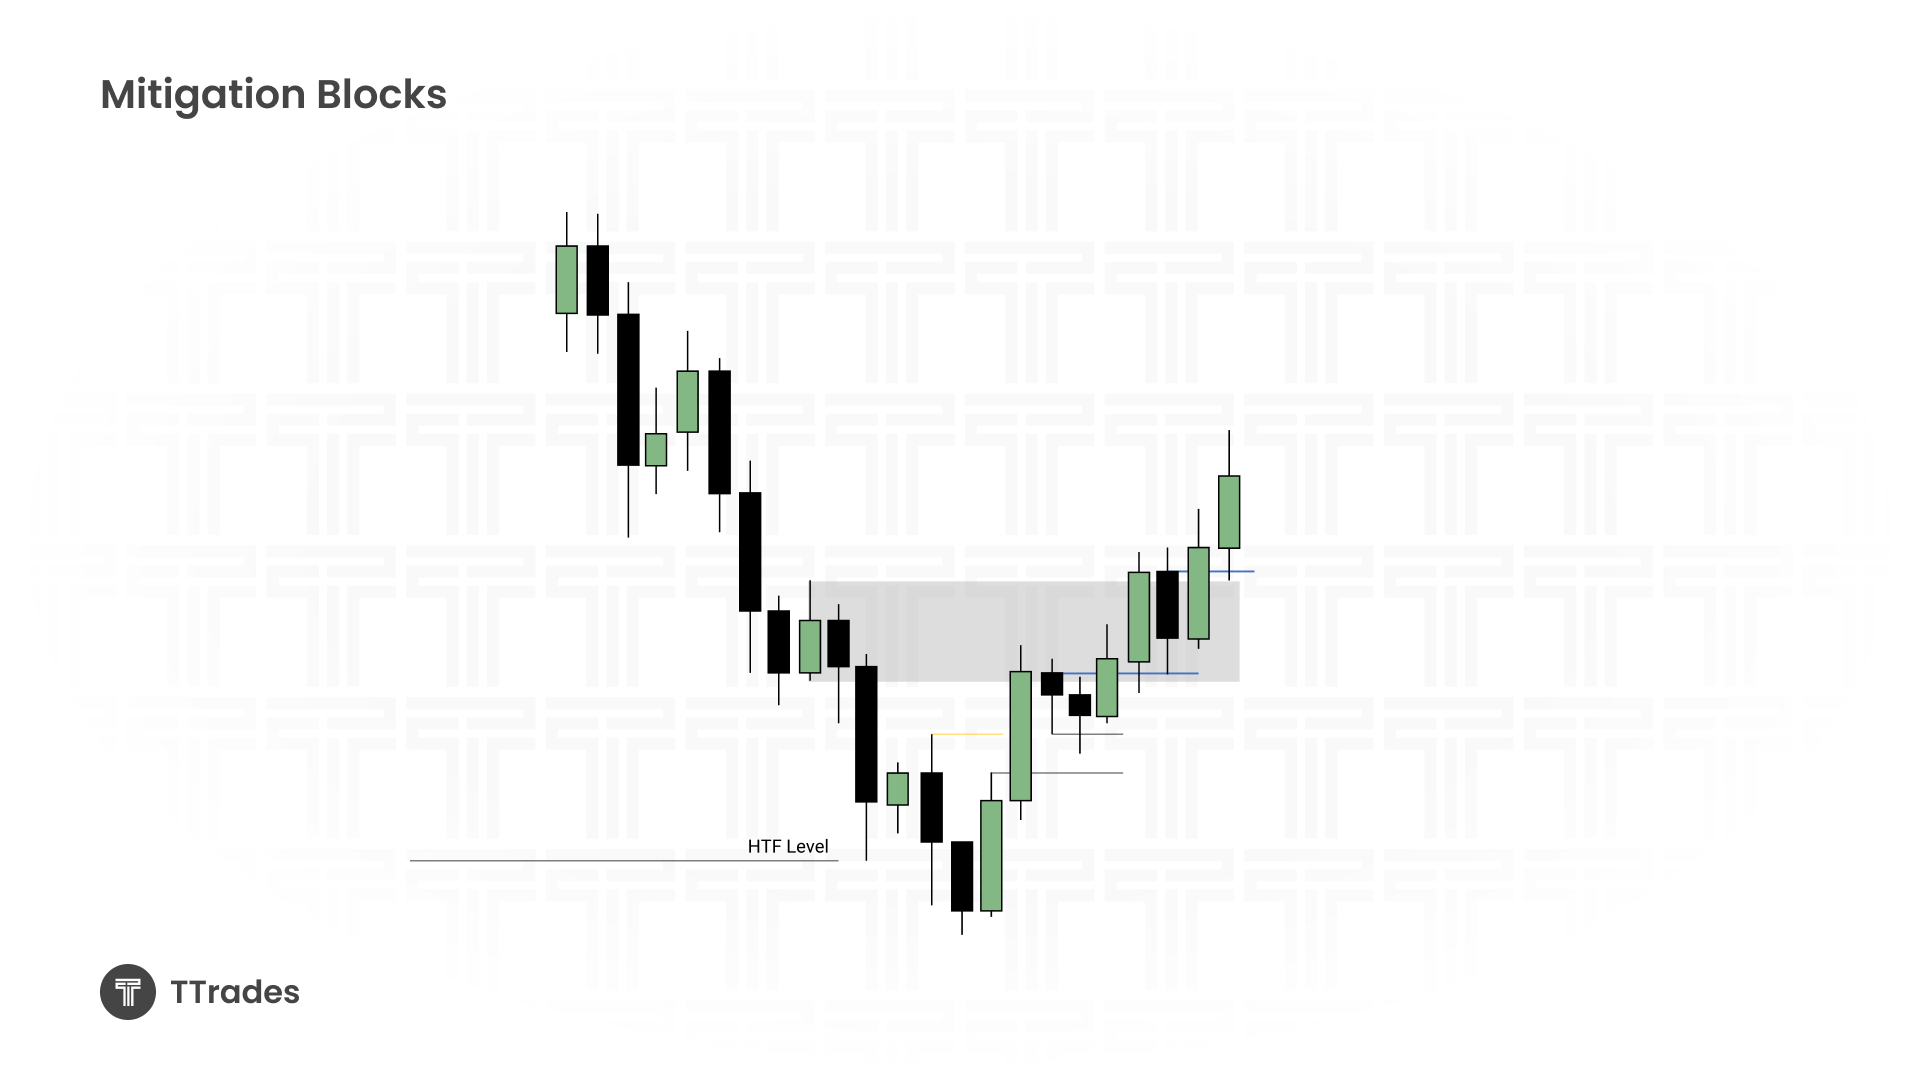
A mitigation block occurs when price disrespects an old order block but then returns to retest it as a new area of interest. In simple terms, it’s when old supply or demand gets repurposed after being violated.
Think of it like this,
A breaker block forms after a liquidity sweep (e.g., price takes out a high before reversing lower).
A mitigation block, however, doesn’t require a sweep, it can simply form after a failure swing, where price creates a lower low (in bearish context) or a higher high (in bullish context) without first taking liquidity.

This makes mitigation blocks more subtle, and in some cases, less reliable unless paired with other factors.
Mitigation Blocks vs. Breaker Blocks
Here’s the key distinction between the two,
Breaker Block, Formed when liquidity is swept (e.g., a high is taken out before a reversal).
Mitigation Block, Formed from old order blocks that have been violated, but price later respects them as areas of accumulation or redistribution.
Example structures,
Breaker → Low → High → Lower Low → Higher High.
Mitigation → Low → High → Lower High → Lower Low.
Trading Mitigation Blocks in Practice
While mitigation blocks can form frequently, not all of them are worth trading. Here’s what to watch for,
High-Probability Setups
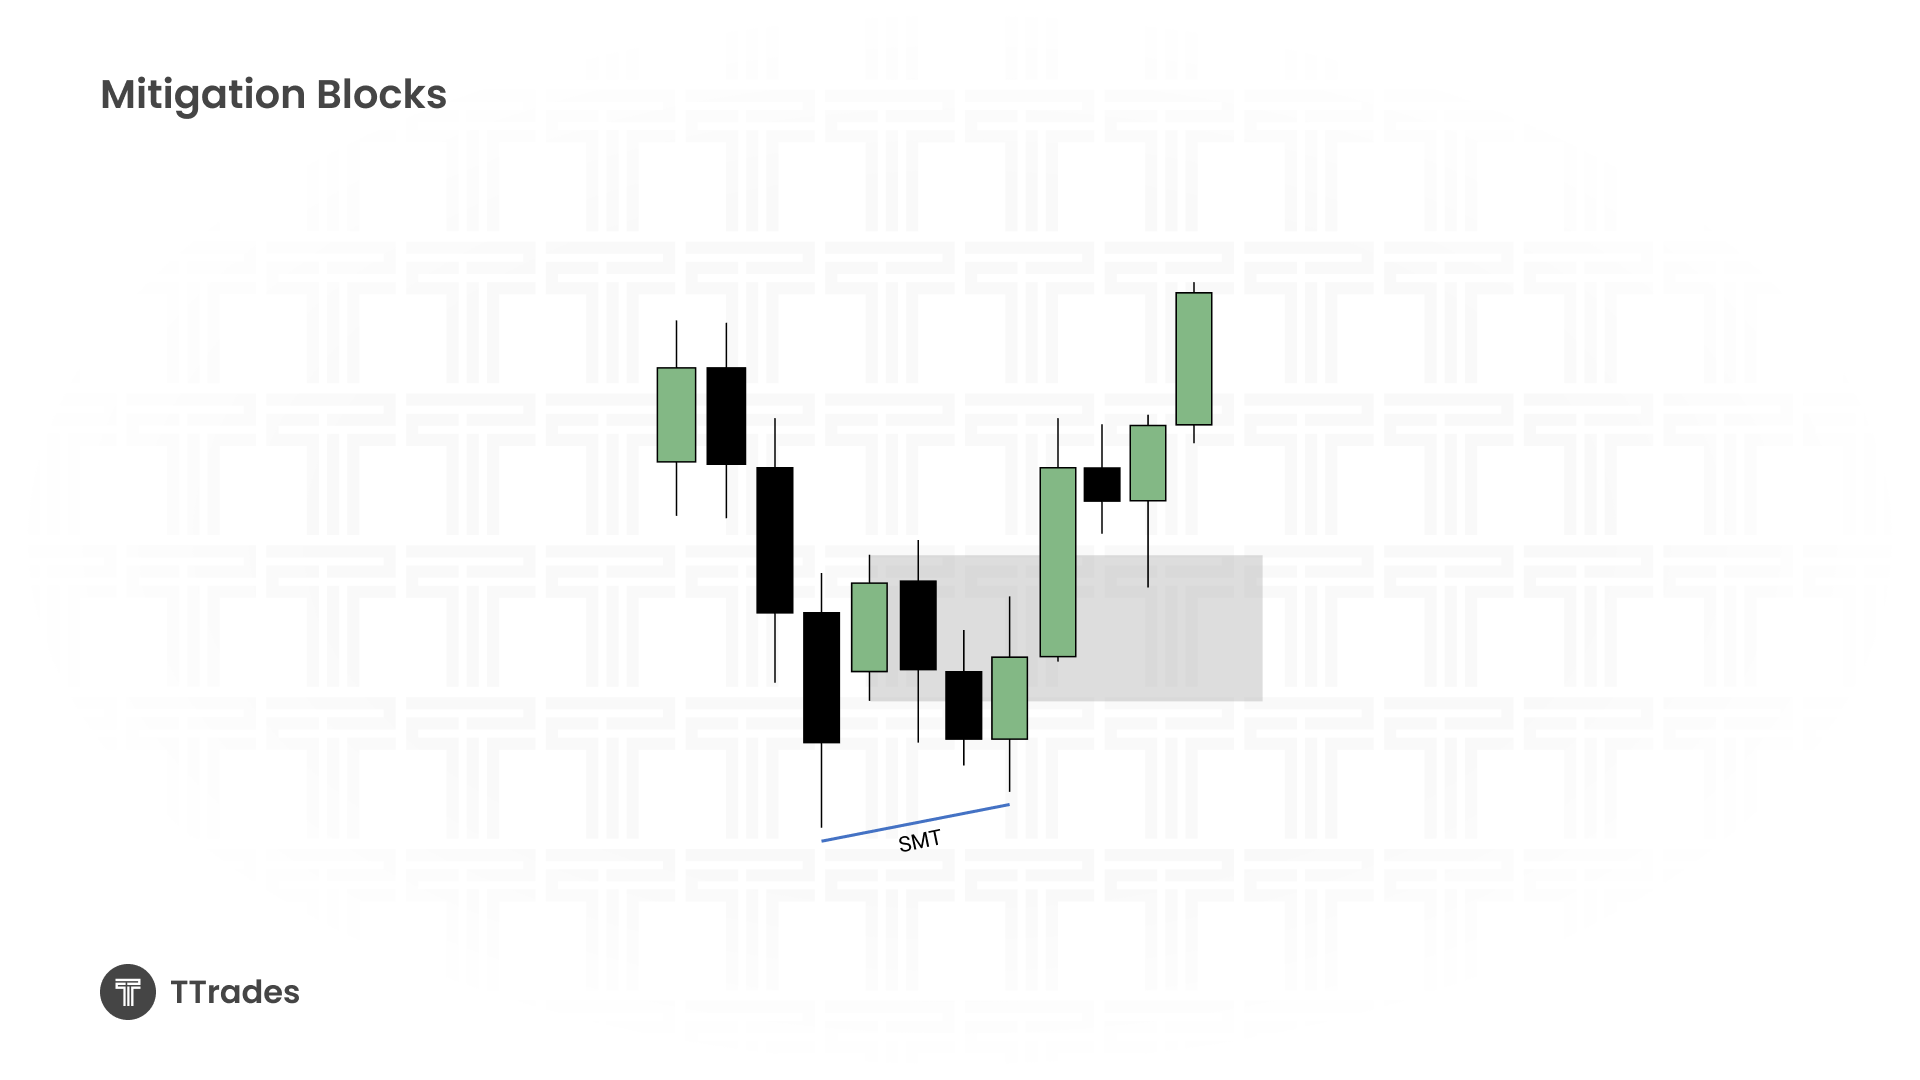
Mitigation blocks overlapping with fair value gaps (FVGs) provide stronger reactions.
- Mitigation blocks aligned with SMT divergence can add confidence. For example, if one index takes a low while another does not, the confluence strengthens the trade.
- Why Avoid Some Mitigation Blocks?
Since they don’t require liquidity sweeps, they often result in failure swings.
This creates choppy conditions where highs remain untaken, which can limit follow-through.
Mitigation Blocks Inside Market Maker Models
Mitigation blocks become even more powerful when viewed within the context of the Market Maker Model.
On the sell side of the curve, order blocks get violated.
Once structure shifts and the market reverses, those violated blocks can now serve as mitigation points.
Old bearish order blocks become potential bullish mitigation zones when dragged forward.
Key Takeaways
Mitigation blocks are repurposed order blocks after violation.
They differ from breaker blocks because they don’t require liquidity sweeps.
High-probability mitigation setups often align with fair value gaps, SMT divergence, or higher timeframe points of interest/
Best applied within a structured framework like the Market Maker Model.
Used properly, mitigation blocks can help refine entries, build stronger confluence, and highlight hidden liquidity zones that most traders overlook.