
Introduction
In this guide, we’re going to tackle a common problem among traders learning ICT concepts: trying to use every single PD array at once.
Contrary to what many believe, it’s usually not a lack of knowledge that causes failure, it’s the inability to filter and focus.
Understanding PD Arrays
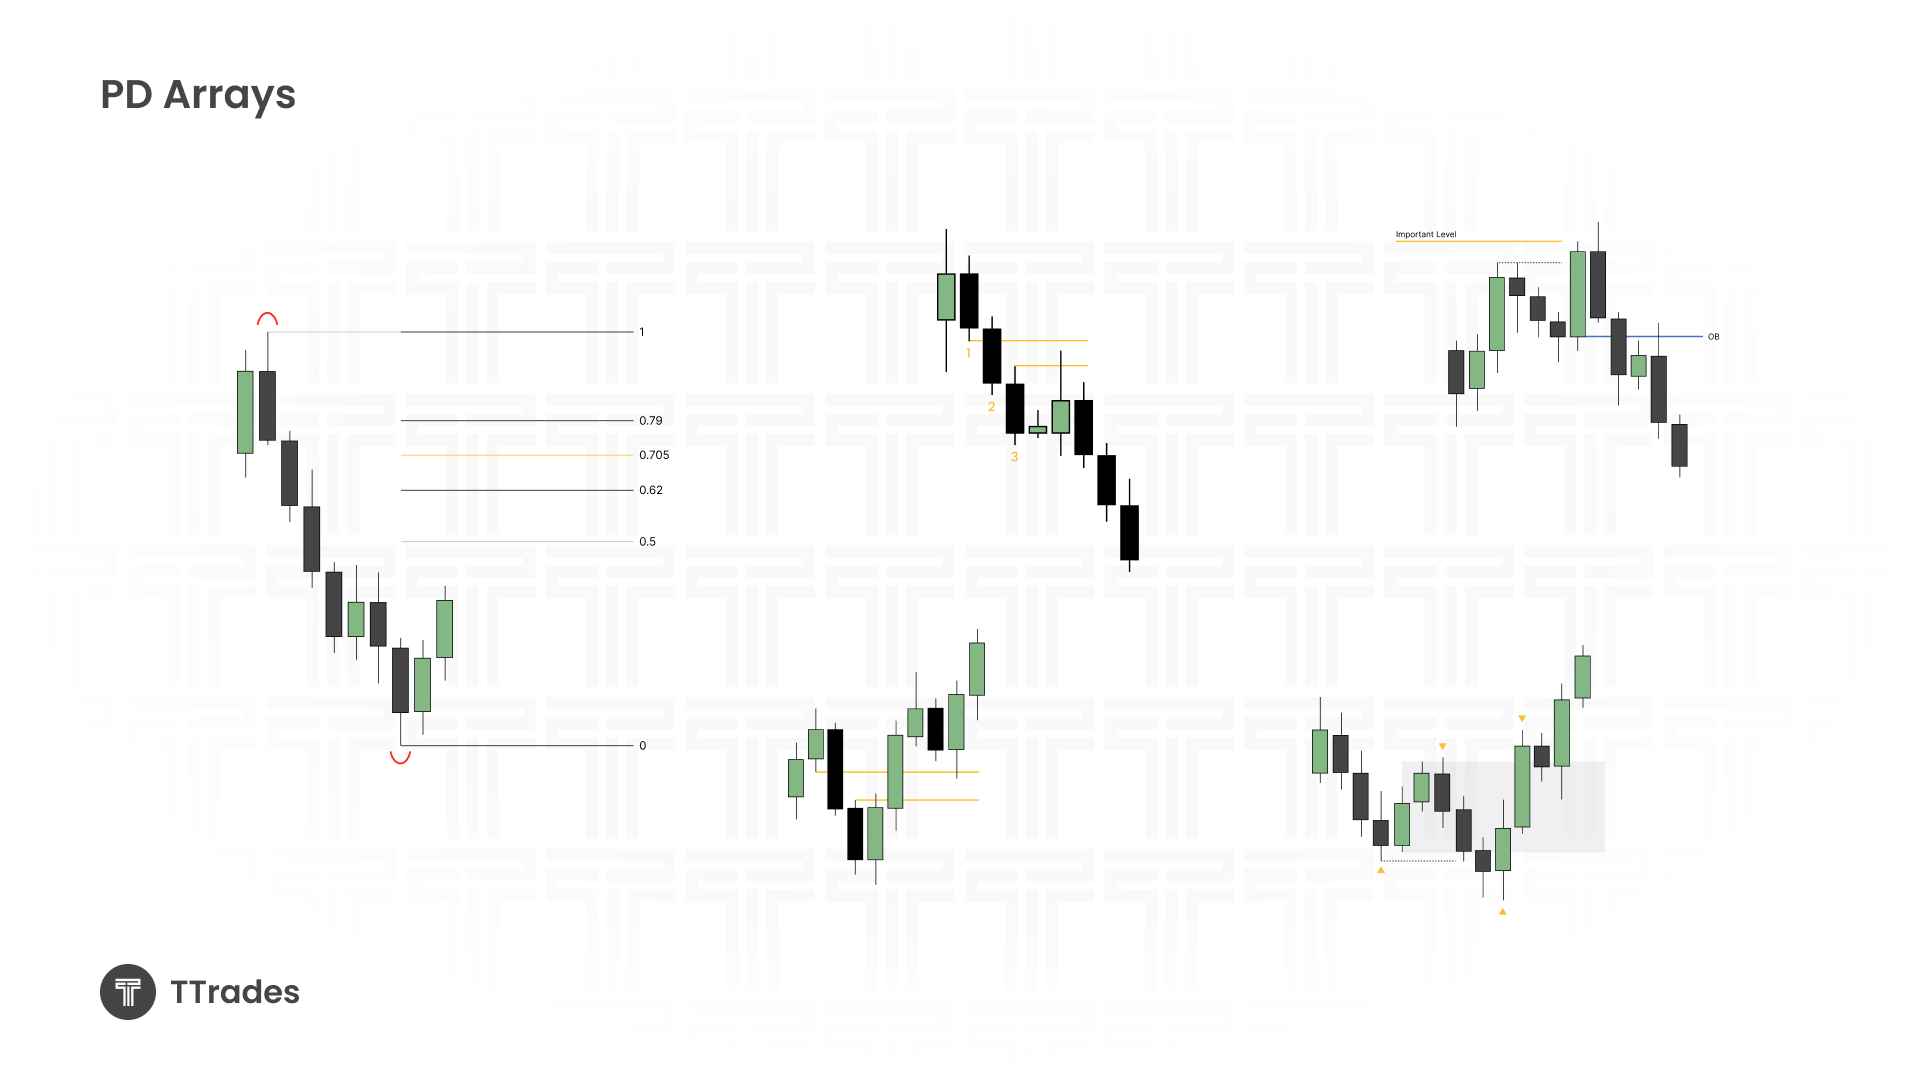
A PD array refers to an individual price delivery concept, such as:
- Fair Value Gap (FVG)
- Inversion
- Breaker Block
- Order Block (OB / CISD)
- Mitigation Block
- Optimal Trade Entry (OTE) or Fibonacci Levels
Learning each of these is valuable, but when it comes to trading, using all of them in real-time can be detrimental rather than helpful.
Why You Shouldn’t Use All PD Arrays at Once
If you’ve seen the Reversal Sequence video, you know multiple elements can appear in a reversal, turtle soup, inversion, CISD, breaker block, and fair value gaps.
While they may all be present, trying to watch for all of them simultaneously leads to:
- Cluttered charts
- Delayed decision-making
- Inconsistent execution
The solution? Pick one PD array to master.

How to Choose Your PD Array
Ask yourself:
- Which PD array is easiest for you to see?
- Which one makes the most sense to you logically?
- How much confirmation do you prefer before entering?
Example:
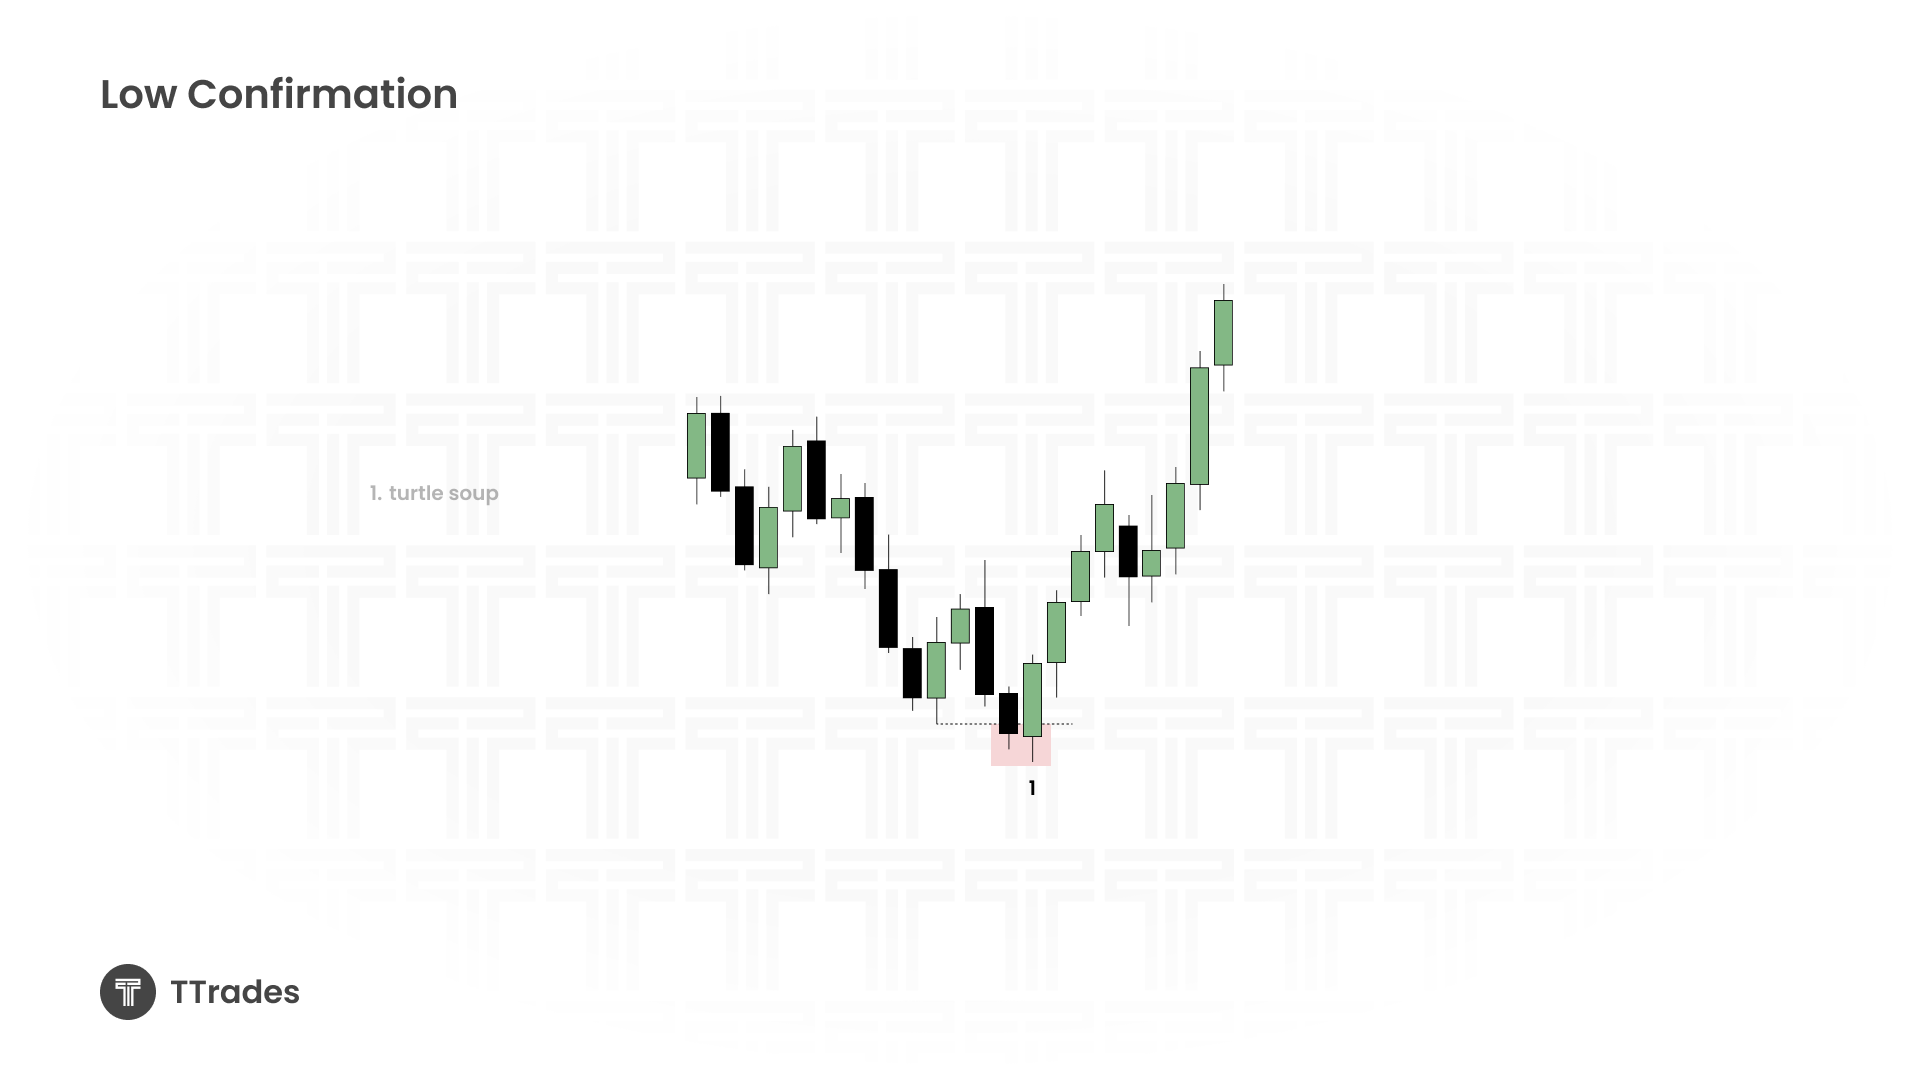
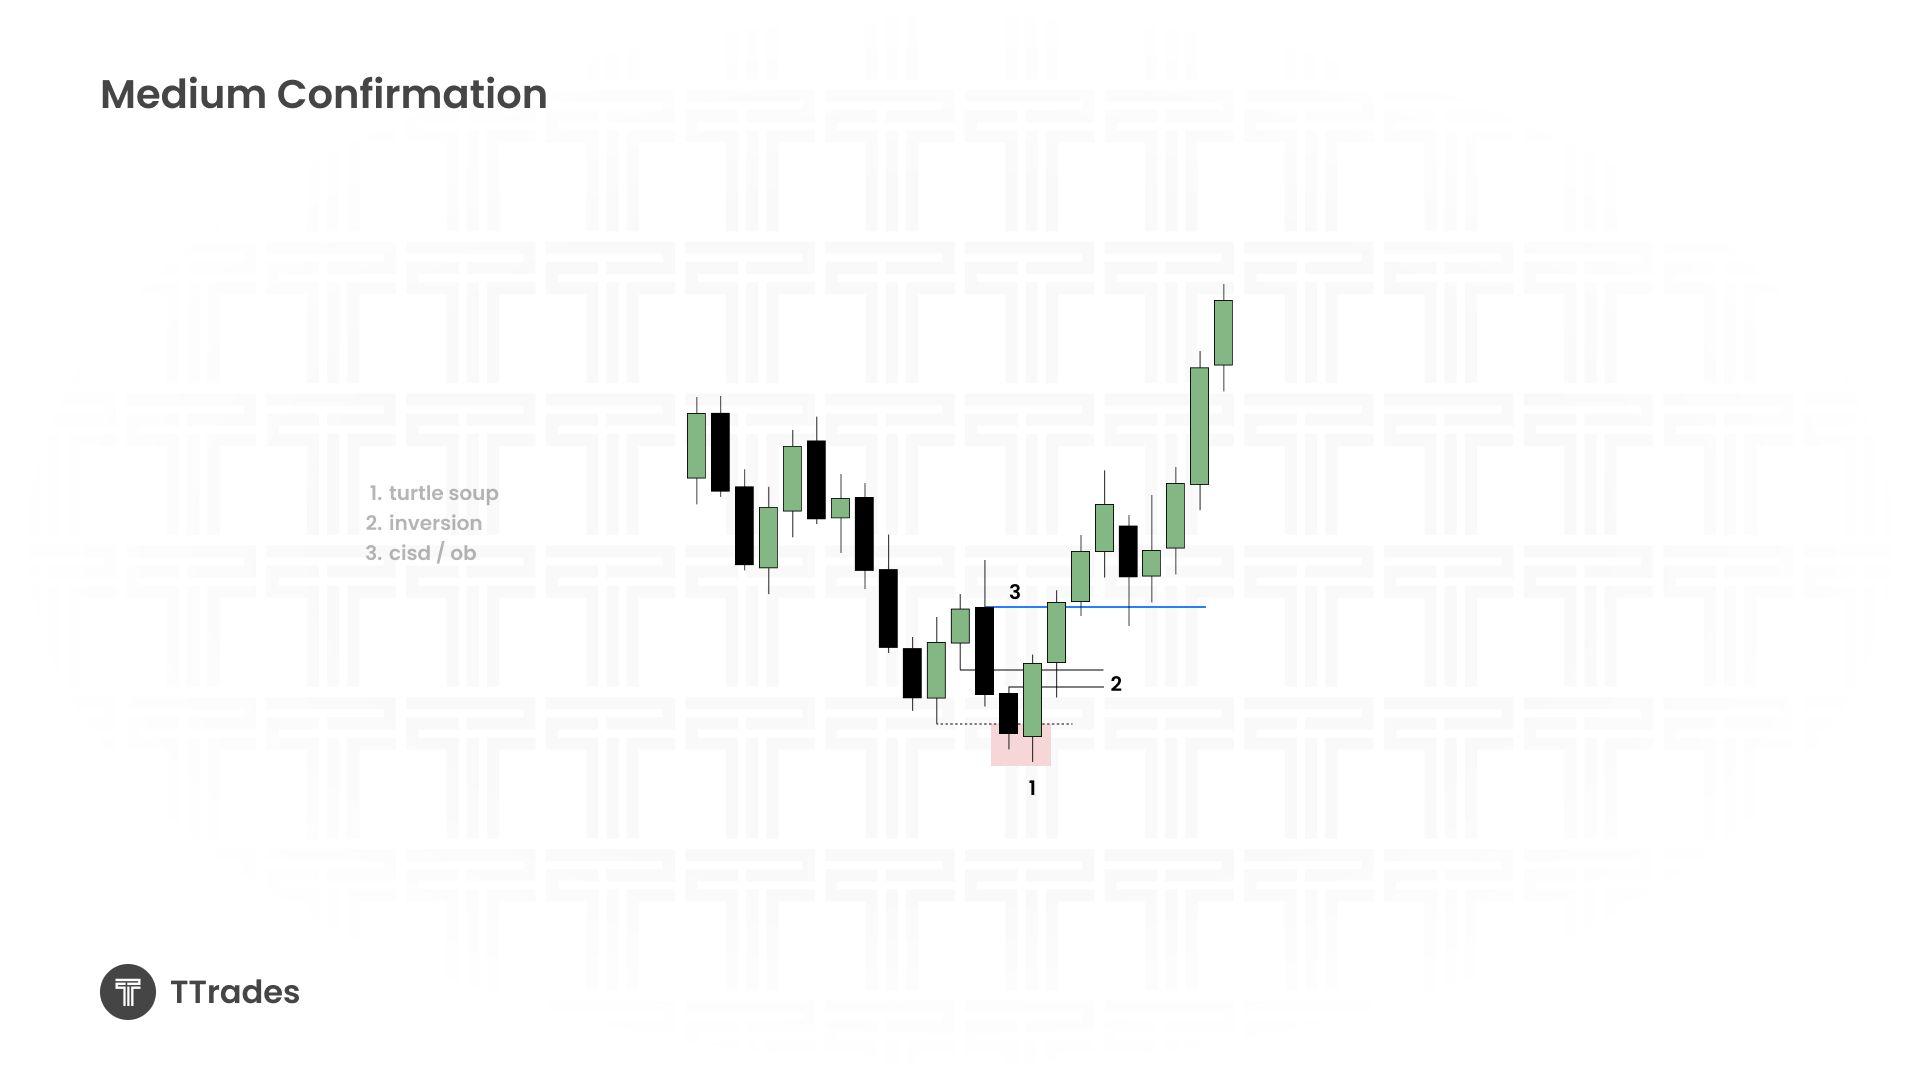
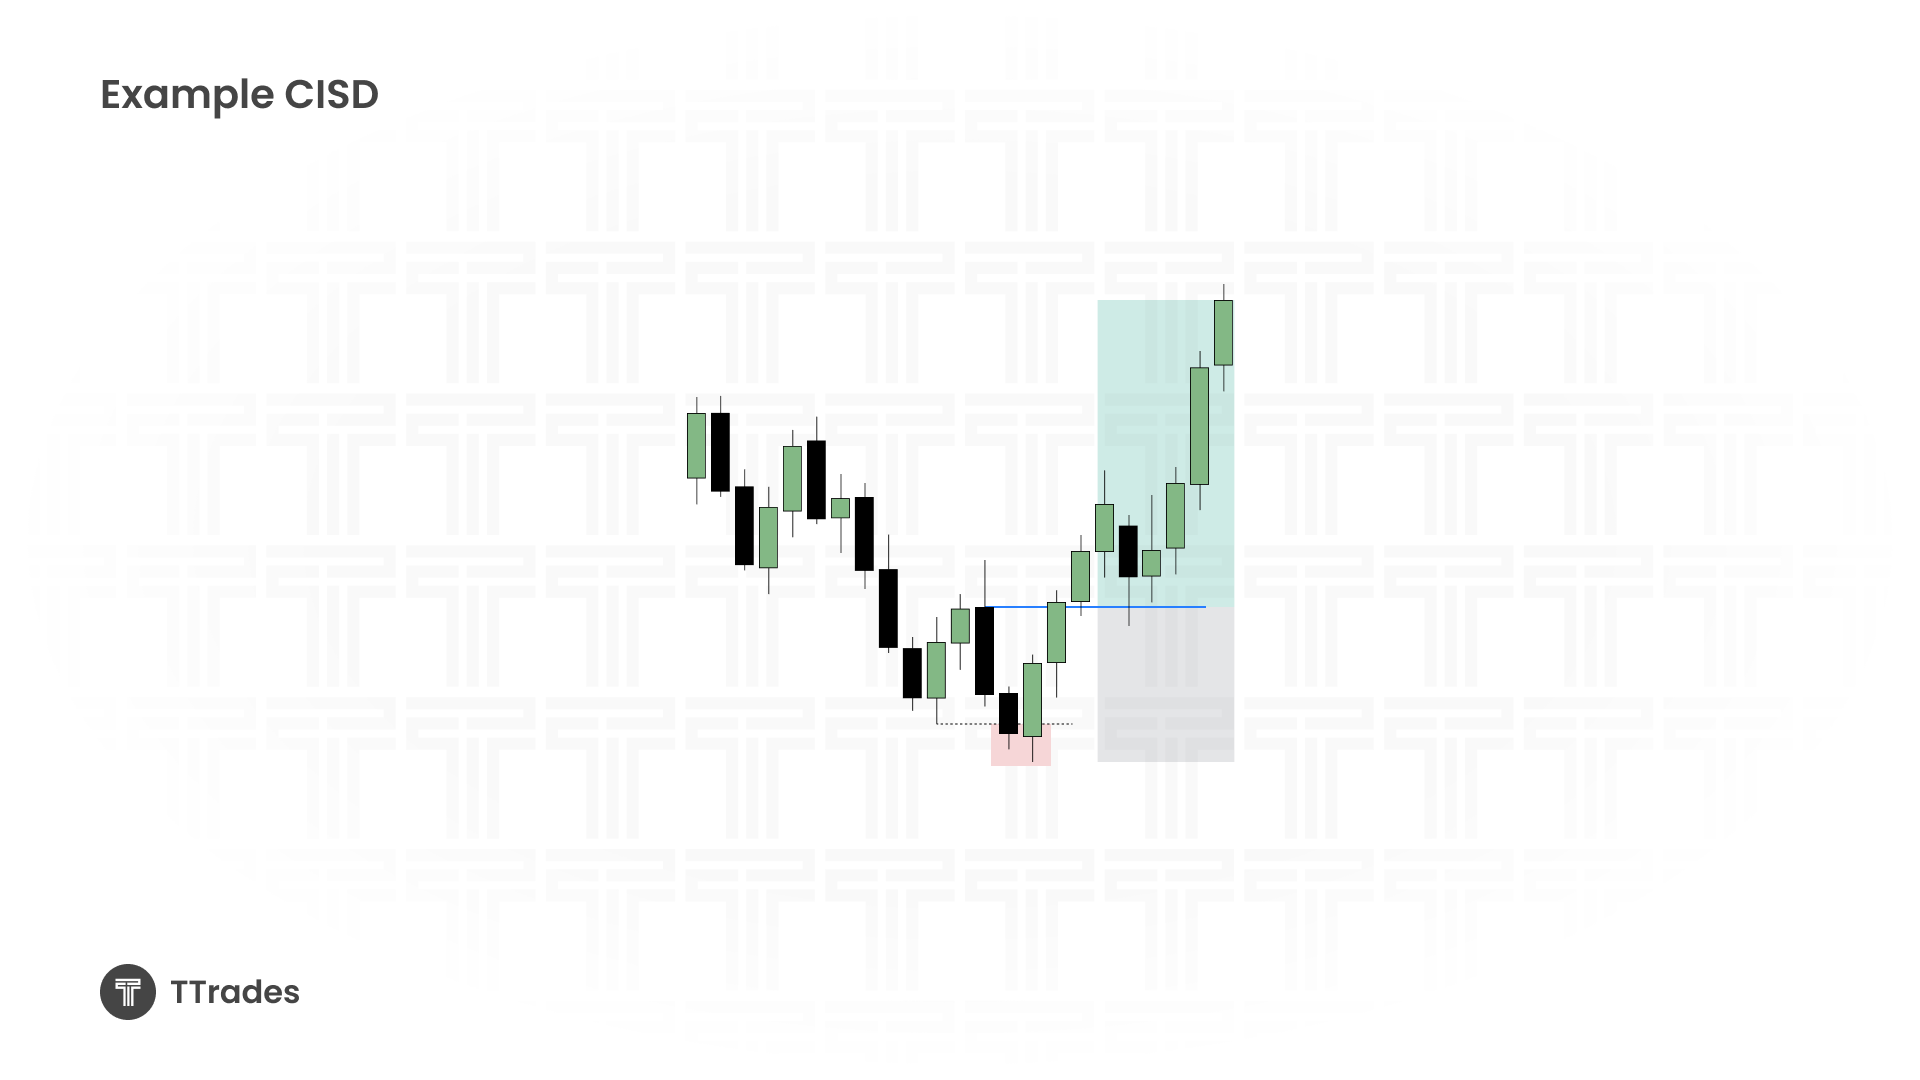
- For me, CISD is the easiest to spot, a simple sweep of a high/low followed by a close through the opposing candle series.
- If you prefer inversions, stick with that. If fair value gaps are clear to you, use those.
Matching PD Arrays to Your Confirmation Preference
Low Confirmation: Entering right after a liquidity sweep (Turtle Soup), early entry but riskier entry.
Medium Confirmation: Waiting for an inversion or CISD before entering.
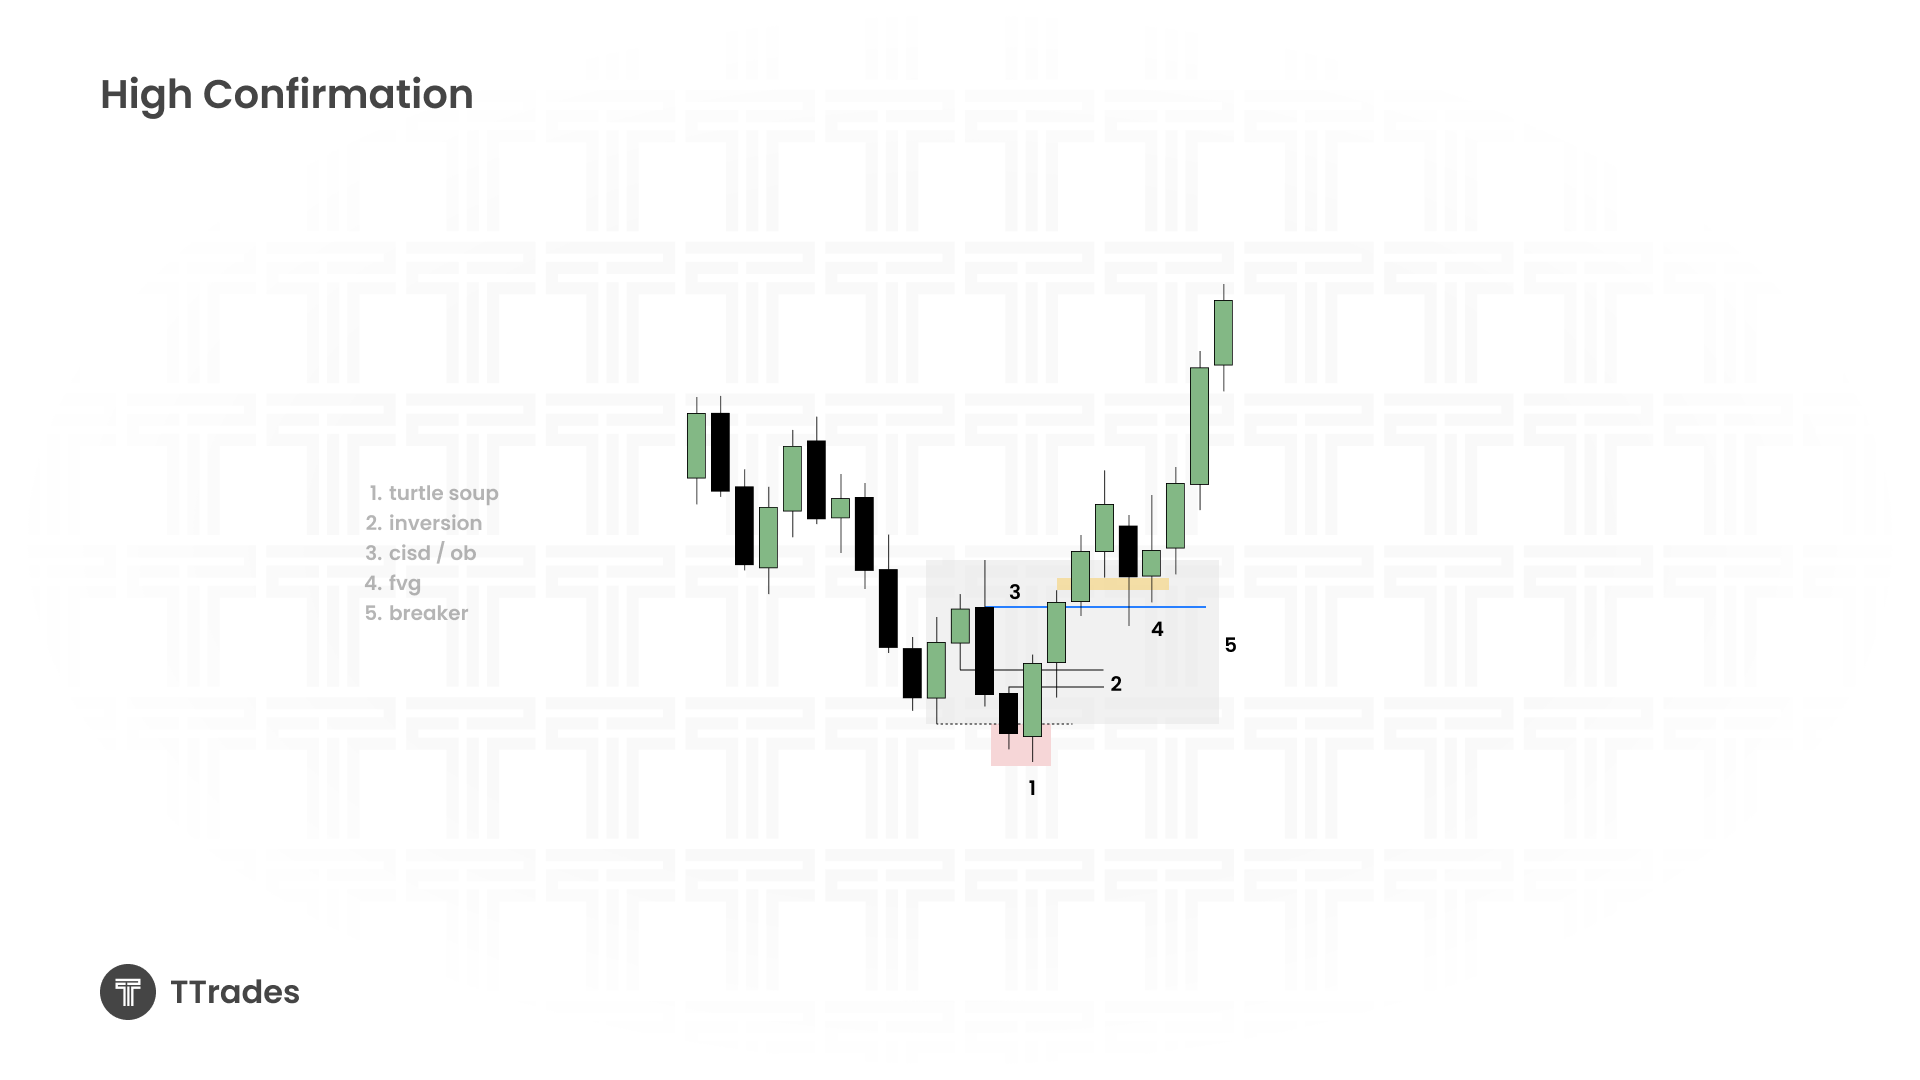
High Confirmation: Waiting for FVG or breaker block formation after the shift in market structure.
The Power of Simplicity in Execution
When you lock in on one PD array:
- Entries become consistent.
- Stops and targets are easier to define.
- You collect cleaner data to refine your trading model.
Example using CISD:
- Identify liquidity sweep.
- Mark the series of opposing candles that made the swing.
- Wait for a close through that series of candles.
- Place stop above/below that swing and target liquidity in the opposite direction.
Combining PD Arrays with Liquidity
Whatever PD array you choose, pair it with highs and lows.
- If you use FVGs, trade them in context of liquidity sweeps.
- If you use breaker blocks, use them when they form off key highs/lows.
Avoid “Shiny Object Syndrome”
When you hit a losing streak, resist the urge to abandon your chosen PD array for something new.
Refining one strategy and sticking with it is more valuable than constantly learning and switching.
Key Takeaways
- You don’t fail because you don’t know enough, you fail because you’re doing too much.
- Pick one PD array that clicks with you and master it.
- Always combine it with liquidity concepts.
- Keep your model simple so you can execute in real time, not just mark up charts in hindsight.